If you work in a profession that requires the use of tools at heights, then you know how important it is to have your tools securely tethered. Tool tethering is essential for safety on worksites and can help prevent serious accidents caused by falling tools. But what do you do when your tools don’t have an attachment point for tethers? The answer is simple: use Ergodyne’s Tool Tails and Self-Adhering Tape to create retrofit attachment points for dropped object prevention.
Ergodyne’s 3103 Accessory Kit – Detachable Loops, 3700 Web Tool Tails and 3713 Elastic Tool Tails are the perfect solutions for attaching tool tethers to tools without built-in attachment points. The 3700 Tool Tails feature a D-ring attachment point that easily attaches to tool lanyards. The 3713 Elastic Tool Tails, on the other hand, feature a loop that can be wrapped around the tool, tool belt, or harness. Both options allow for a secure attachment of tool tethers to virtually any tool.
But how do you attach the Tool Tails to your tools? That’s where the 3755 Self-Adhering Tape comes in. The 3755 Self-Adhering Tape is a flexible, self-adhering tape that can be wrapped around your tools to create a secure attachment point for Tool Tails. The tape is easy to apply and can be removed without leaving any residue, making it a versatile solution for attaching tethers to tools.
How to Create Retrofit Attachment Points – Dropped Object Prevention
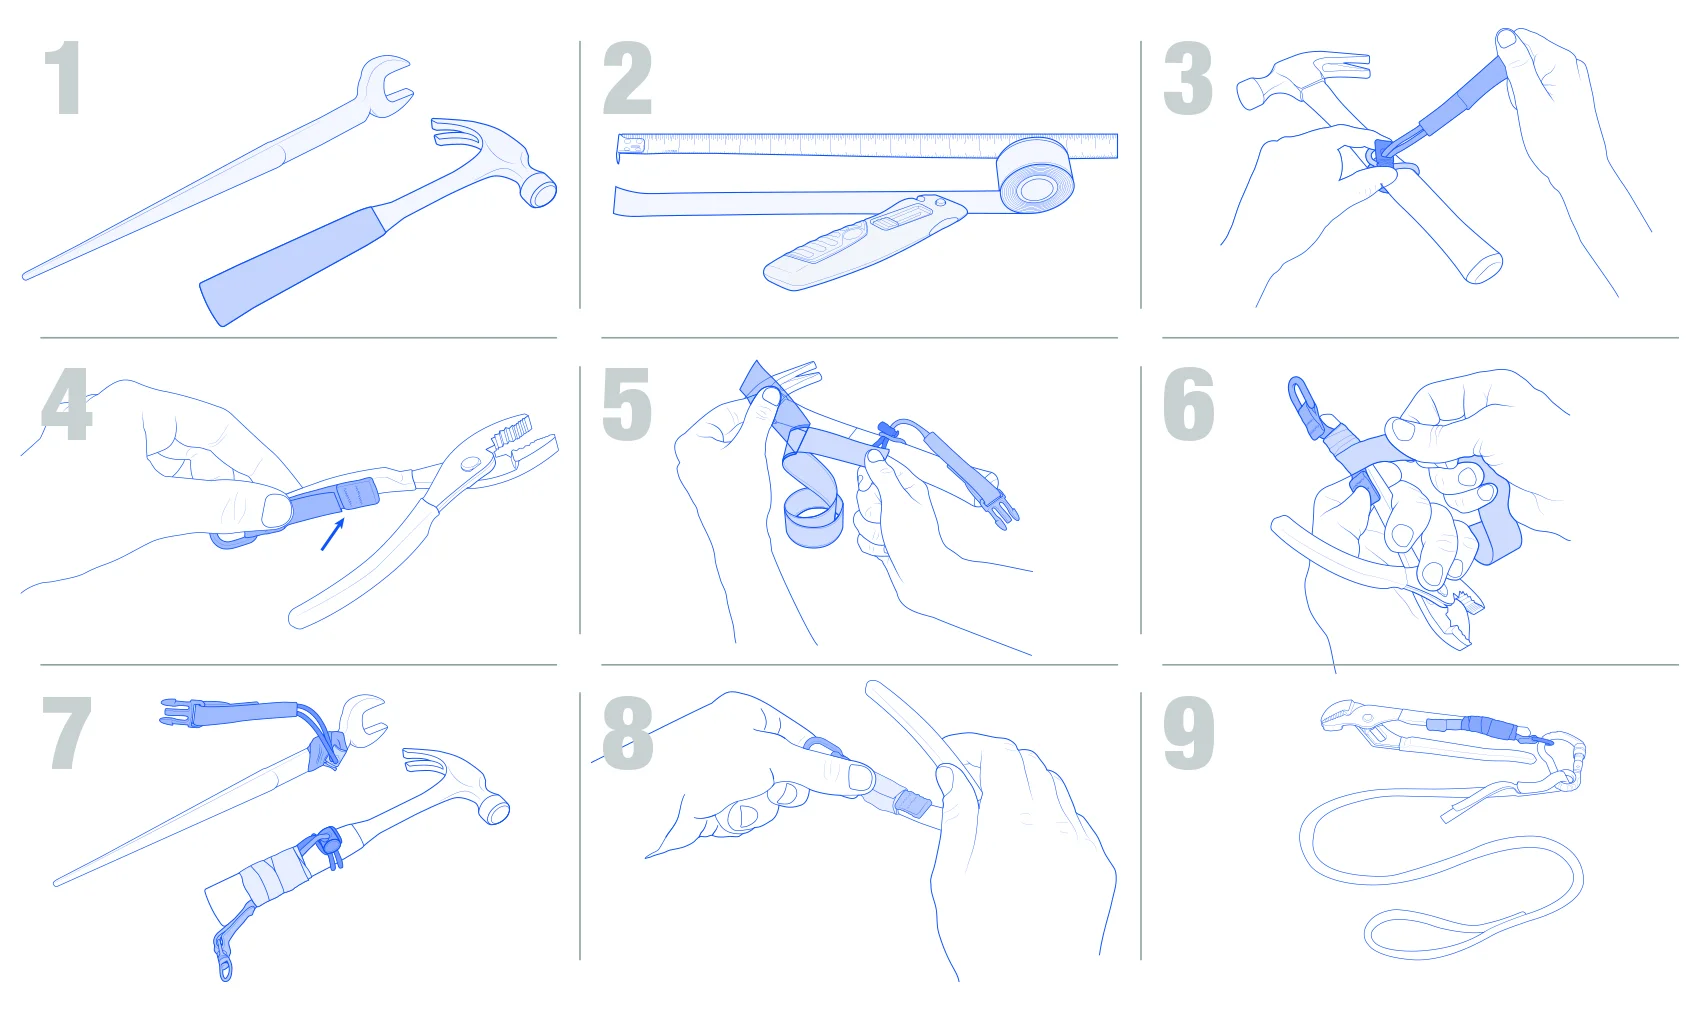
1 // Measure the diameter and weight of your tool, then use the Selection Grid to determine the proper Tool Tail and proper length of tape to apply. If the tool is not cylindrically shaped, measure the tool at the widest axis when determining the diameter. If the tool is tapered, measure the area with the largest diameter you can create the attachment on.
2 // Measure and cut a specified length of tape indicated in the table below.
|
TOOL |
WEB TAILS & TOOL |
MINIMUM NUMBER OF TIMES |
TOOL |
TOOL |
TOOL |
TOOL |
|---|---|---|---|---|---|---|
|
0.9kg |
3700, 3103, 3713 |
6 |
24.5cm |
48.0cm |
72.5cm |
96.5cm |
|
2.3kg |
3103, 3713 |
10 |
41.0cm |
80.0cm |
120.0cm |
160.0cm |
|
4.6kg |
3713 |
12 |
48.0cm |
96.5cm |
143.0cm |
192.0cm |
*Note: Tool Tethers can be directly attached with tape using the methods described in these instructions. Please ensure the capacity is appropriate for the tool
3 // Choke the 3713 or 3103 Tool Tail onto the tool by sliding it around the tool’s shaft and snug the barrel lock down tightly if applicable. If the tool is tapered, position the tail on or near the portion with the largest diameter.
4 // Lay the Tool Tail onto the tool. Ensure the Tool Tail is positioned as far up the shaft of the tool as possible without affecting its use. A minimum 25mm away from the end of the tool is suggested. For the Web Tool Tails, ensure the web catch points are facing up.
5 // Remove the plastic coating from the tape.
6 // Wrap the tape once around itself beginning below one of the web catch points on 3700 Tool Tail or directly below the barrel lock on Elastic 3713 or 3103 Tool Tails. This keeps the tape in position for continued wraps.
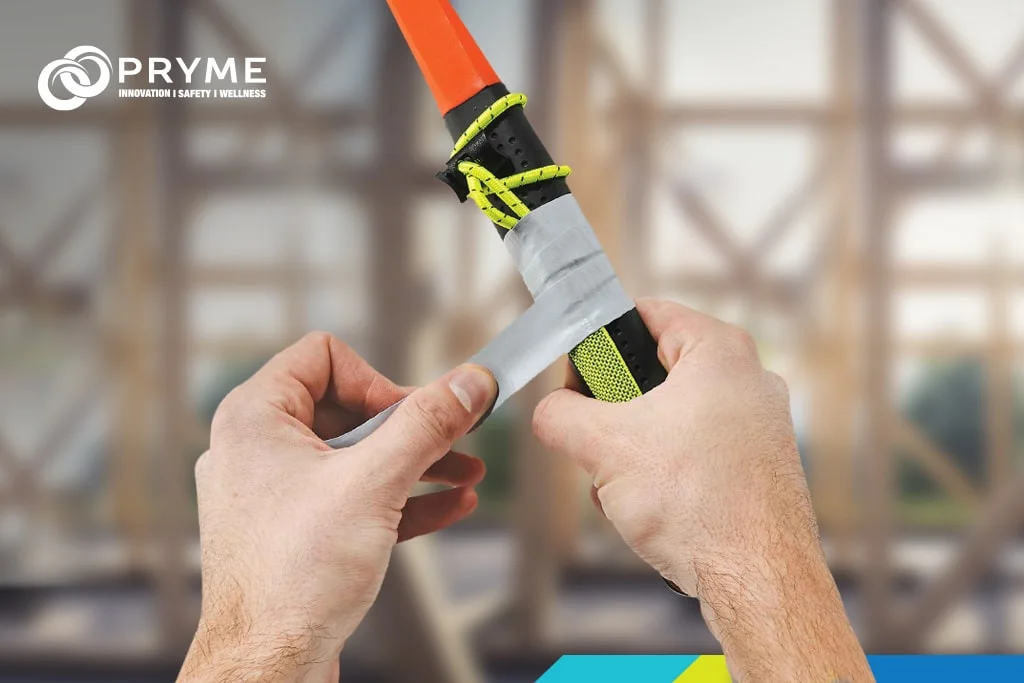
7 // Continue wrapping and stretching the tape firmly. Overlap previous wraps by at least half the tape’s width. If the 3713 or 3103 Tool Tail is used, the tape can be wrapped on top of tail or criss-crossed around both sides of tail. If a mistake is made, unwrap the tape backwards and reapply. Continue wrapping tape until you reach the end.
8 // Firmly push down on the end. The tape will then begin to bond to itself.
9 // Attach a tool lanyard to complete an appropriate tethering system.
Using Ergodyne’s Tool Tails, Elastic Tool Tails, and Self-Adhering Tape together allows you to create a custom tethering solution for any tool. With a variety of attachment options and a secure, reliable connection, you can work confidently knowing that your tools are safely tethered.
Ultimately, the success of a Drop Free Zone depends on the commitment of both employers and employees to prioritise safety. This can include investing in proper equipment and training, setting clear guidelines and expectations, and creating a culture where safety is everyone’s responsibility. By working together, employers and workers can help create a safer, more productive worksite for all.
For more information on the risk of falling objects visit Safe Work Australia.
TOOLBOX TALKS: At Pryme, we understand the importance of safety in high-risk industries, and we are committed to providing you with the knowledge to keep your workplace safe. Our TOOLBOX TALKS program offers a wide range of safety training sessions, delivered by our experienced safety professionals.
RELATED: Creating a Drop Free Zone